📩 Adding items to Pure
This guide provides a generic overview of how to start adding a new research output record in Pure. For detailed instructions on specific types, please find the relevant guide under in the wiki sidebar (to the left).
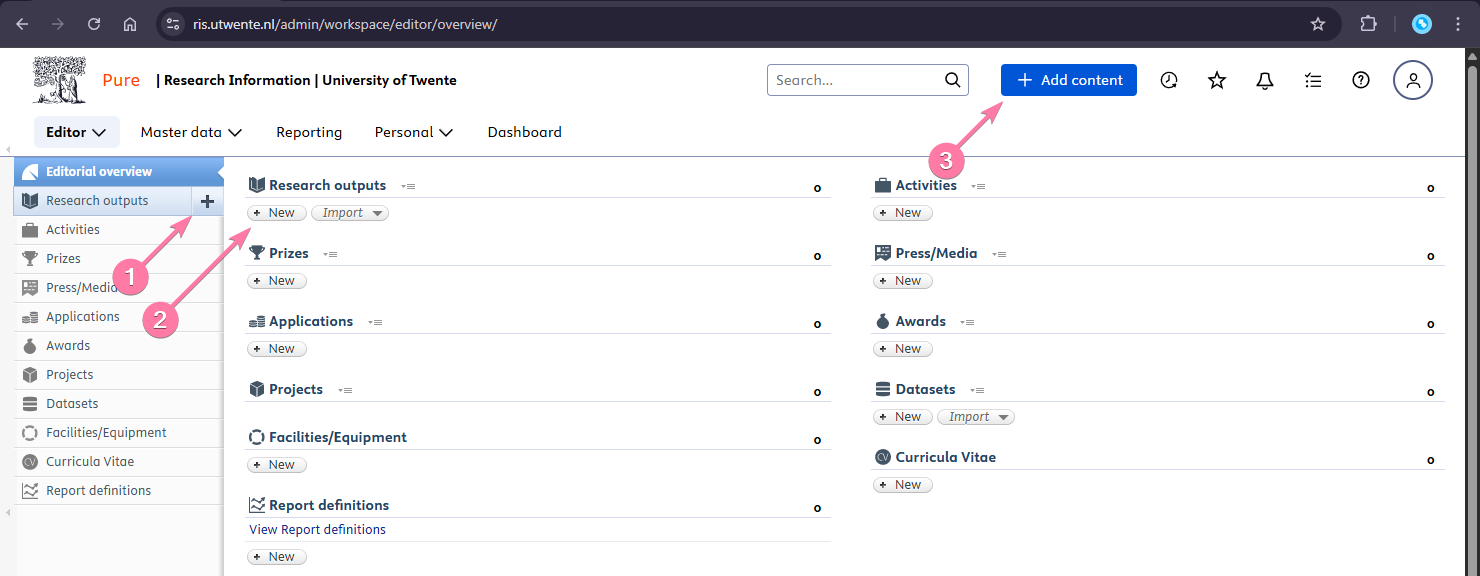
You can start adding new items in several ways: click the Add new content button at the top, hover over a content type (e.g., “Research outputs”) in the left-hand menu and click the + sign that appears, or press the '+ New' button below a category.

You'll now see the 'Choose submission' window. Choose the type of content you want to add. Depending on which item, you'll need to click several times. The specific guides can help you figure out the correct category.
Once an item is selected, the fields need to be filled. While each template is different, these common fields, options, or UI elements are often present:
- Mandatory Fields: Any field marked with a red asterisk (*) must be completed, or you will be unable to save the record.
- Publication State: You can specify if the work is “In press,” “Published,” “Unpublished,” etc. The default is Published.
- Electronic version(s) and links: This is where you can upload a full-text PDF of the publication (e.g., the peer-reviewed author version, or your author's manuscript) and add links, such as a DOI, landing page, etc.
- Relations: Use this section to create links between this research output and other content in Pure, such as 🛠️ Projects (that funded the research), related 🔏 Patents or 🗂️ Datasets, etcetera.
- Visibility: The default is Public, which means the record will be displayed on the UT Research Information Portal. You can restrict this if necessary by selecting “Campus,” “Backend,” or “Confidential.”
At the very bottom of the template, you will see the Pure registration status.
- When you are finished editing, set the status to For validation and click Save.
- This submits the record into the workflow for processing and eventual publication on the portal.
- If you are not finished and want to save your work to continue later, set the status to Entry in progress before saving.
TODO: Add screenshot: The status dropdown at the bottom of the editor template, showing the options “Entry in progress” and “For validation”, as in QRC p.32.